Ryan Bone’s Video Art Portfolio
Bonus Content Section
2D Animations & Editing Showcases
“Memory Mugged”
Made during Ryan’s Fall 2022 (9th) semester at GMU. Created for the “I Remember” assignment in Professor White’s AVT 382 2D Experimental Animation course.
“Memory Mugged” [Additional assistance is listed in the end credits]
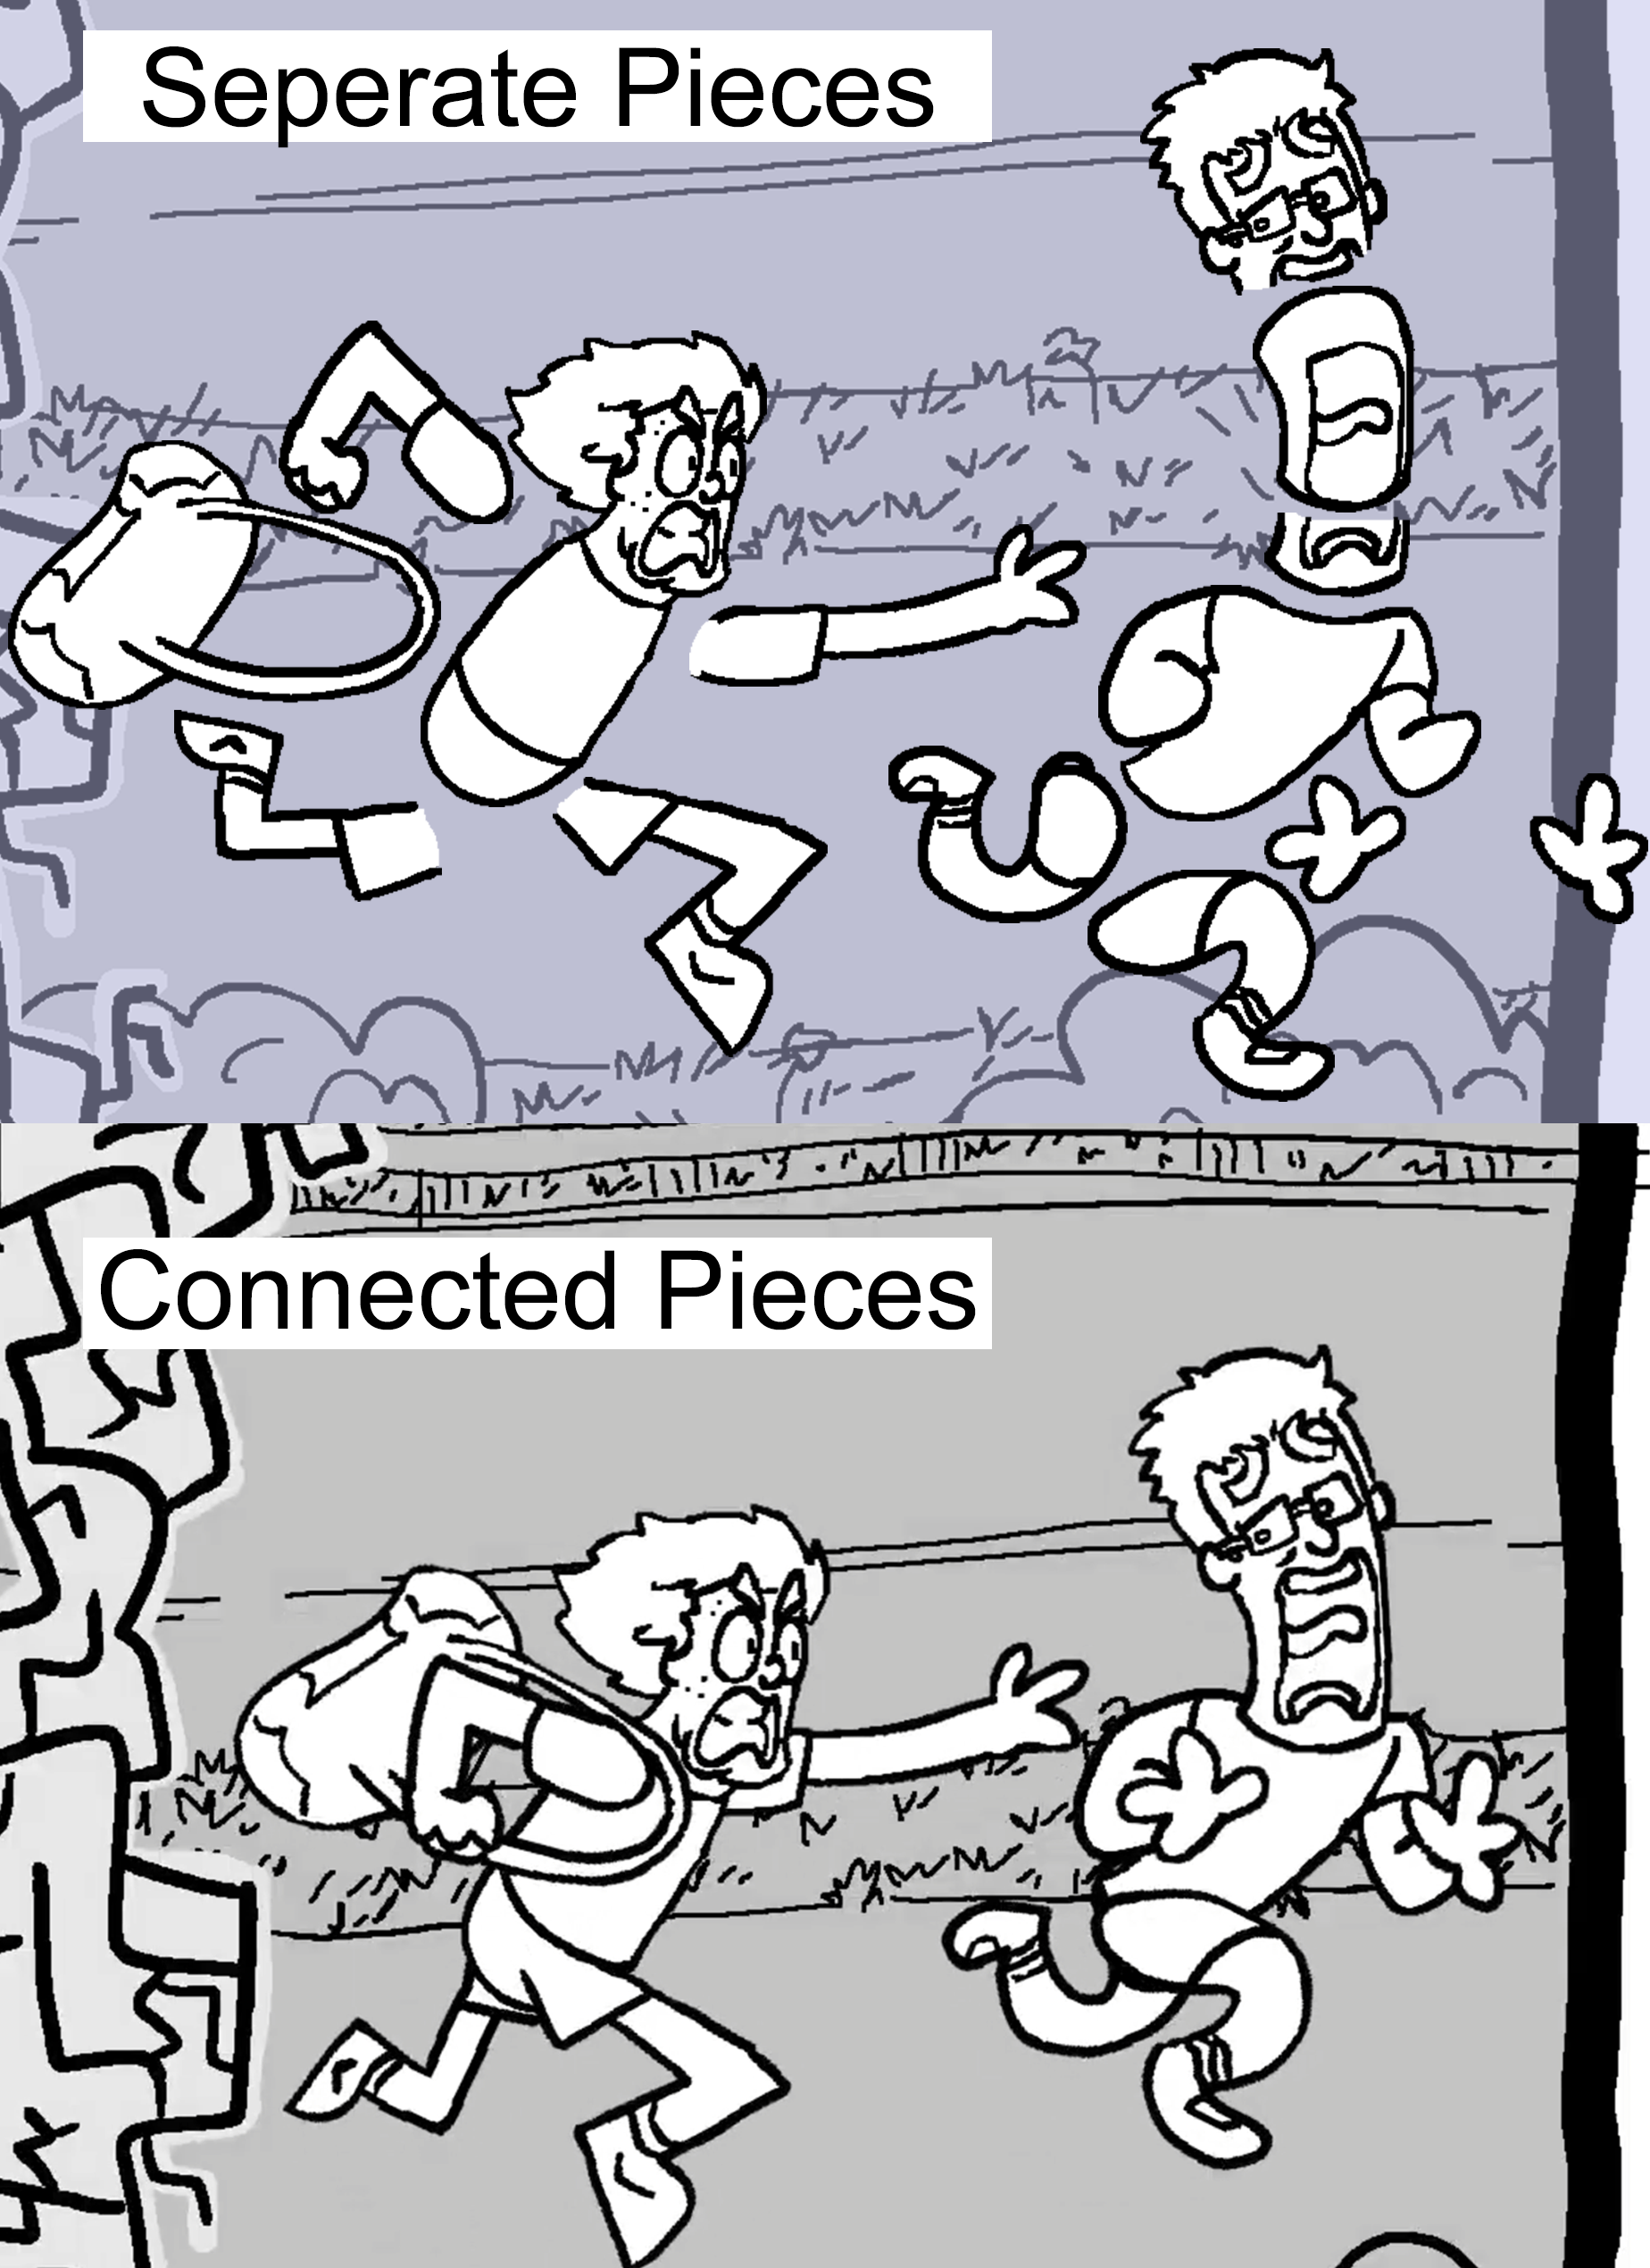
Assigned to make an animation based on memories, Ryan decided to animate a true story about how he remembered a time in his life differently than his brother did. After Ryan wrote the script (basing it entirely off a true phone call the brothers previously had) and recorded the dialogue, he got to work drawing out each scene in Adobe Photoshop with an XP-Pen tablet. To create the fluid, comic-book style that he wanted to portray, Ryan made as many elements of each scene into different layers, so that they could be keyframe animated individually within Adobe Premiere and After Effects. With the many layers each created and exported, Ryan spent many days and hours keyframing each element, timing their rotations and positions to utilize the eye-catching overlapping and follow-through principles of animation.
“Memory Mugged: Multiple Layer Effect Showcase”
“Memory Mugged: Comic Panel Scrolling Background”
“Abstract”
Made during Ryan’s Fall 2022 (9th) semester at GMU. Created for the “Everyday Moments Revealed” assignment in Professor White’s AVT 382 2D Experimental Animation course.
“Abstract” [Audio sources not created by Ryan and are listed in the end credits]
Assigned to make an animation based on people’s different views within everyday life, Ryan decided to focus in on how hard it can be to unsee other people’s negative perspectives. To create this narrative, Ryan drew three abstract images in purple, then drew an optimistic take on the art in blue, and a pessimistic take on the art in red, all within Adobe Photoshop with an XP-Pen tablet. With the drawings in the background complete, Ryan drew the two characters and their expressions before taking them into Adobe Premiere and After Effects to keyframe their motions throughout the scene. Finally, make it clear to the audience that the smaller character’s perspective was changed irreversibly, various elements in After Effects were used to distort the abstract art on the wall, timing the changes in the background with the interactions in the foreground. The finally piece portrays the importance of staying true to your vision, no matter how challenging it can be, especially when it is so positive and healthy.
“Abstract: Art Interpretation Collage”
“The Comic Comet”
Made during Ryan’s Fall 2022 (9th) semester at GMU. Created for the “Alternative Worldlines” assignment in Professor White’s AVT 382 2D Experimental Animation course.
“The Comic Comet” [All audio sources are not created by Ryan and any additional assistance is listed in the end credits]
Assigned to make an animation based on an alternate universe, Ryan decided to create a comedic animation that explores a world where elements of comic books and the real word interact together. Ryan started the project by coming up with as many jokes he could think of within this universe, then creating a script and storyboard that tied the best ones together within a short story. With the help of his two roommates, Henry Torres Gomez and Camila Anderson, Ryan acted in and filmed the live-action segments of the video. Afterwards, Ryan edited the footage together, and recorded clean audio using Adobe Premiere. To create the comic book visuals, Ryan drew each element in Adobe Photoshop with an XP-Pen tablet, then brought them into Adobe After Effects to use many different effects to create the many visually complex jokes. Comedy is a difficult genre to create art in, but Ryan enjoyed every second of working on The Comic Comet, bringing each wacky moment from storyboard to animation.
“The Life Cycle of Leaves”
Made during Ryan’s Spring 2021 (6th) semester at GMU. Created for the “Natural World” assignment in Professor Durkin’s AVT 280 Introduction to New Media Art course. All art is created and edited by Ryan Bone, except for the sound effects and music which are credited at the end of the video.
“The Cycle of Leaves” [Audio content and informational sources that are not directly made by Ryan are shown in the end credits]
Background
Ryan was tasked with making an educational video about a part of nature, Ryan chose to focus on a topic he always thought was interesting, plant leaves. A leaf’s life is a perfect circle, from growth to death, and in death, used to grow anew. The life cycle of a leaf is a cycle that includes a lot of physical motion and transitions, which allowed Ryan to create interesting visuals. Interesting and constantly changing visuals is key to keeping educational content for all ages engaging the whole way through. In creating these visuals, Ryan used many different video editing and animation techniques to bring his ideas to life, with Adobe Premiere, After Effects, Photoshop, and an XP-Pen Tablet.
Camera Motion Across Art
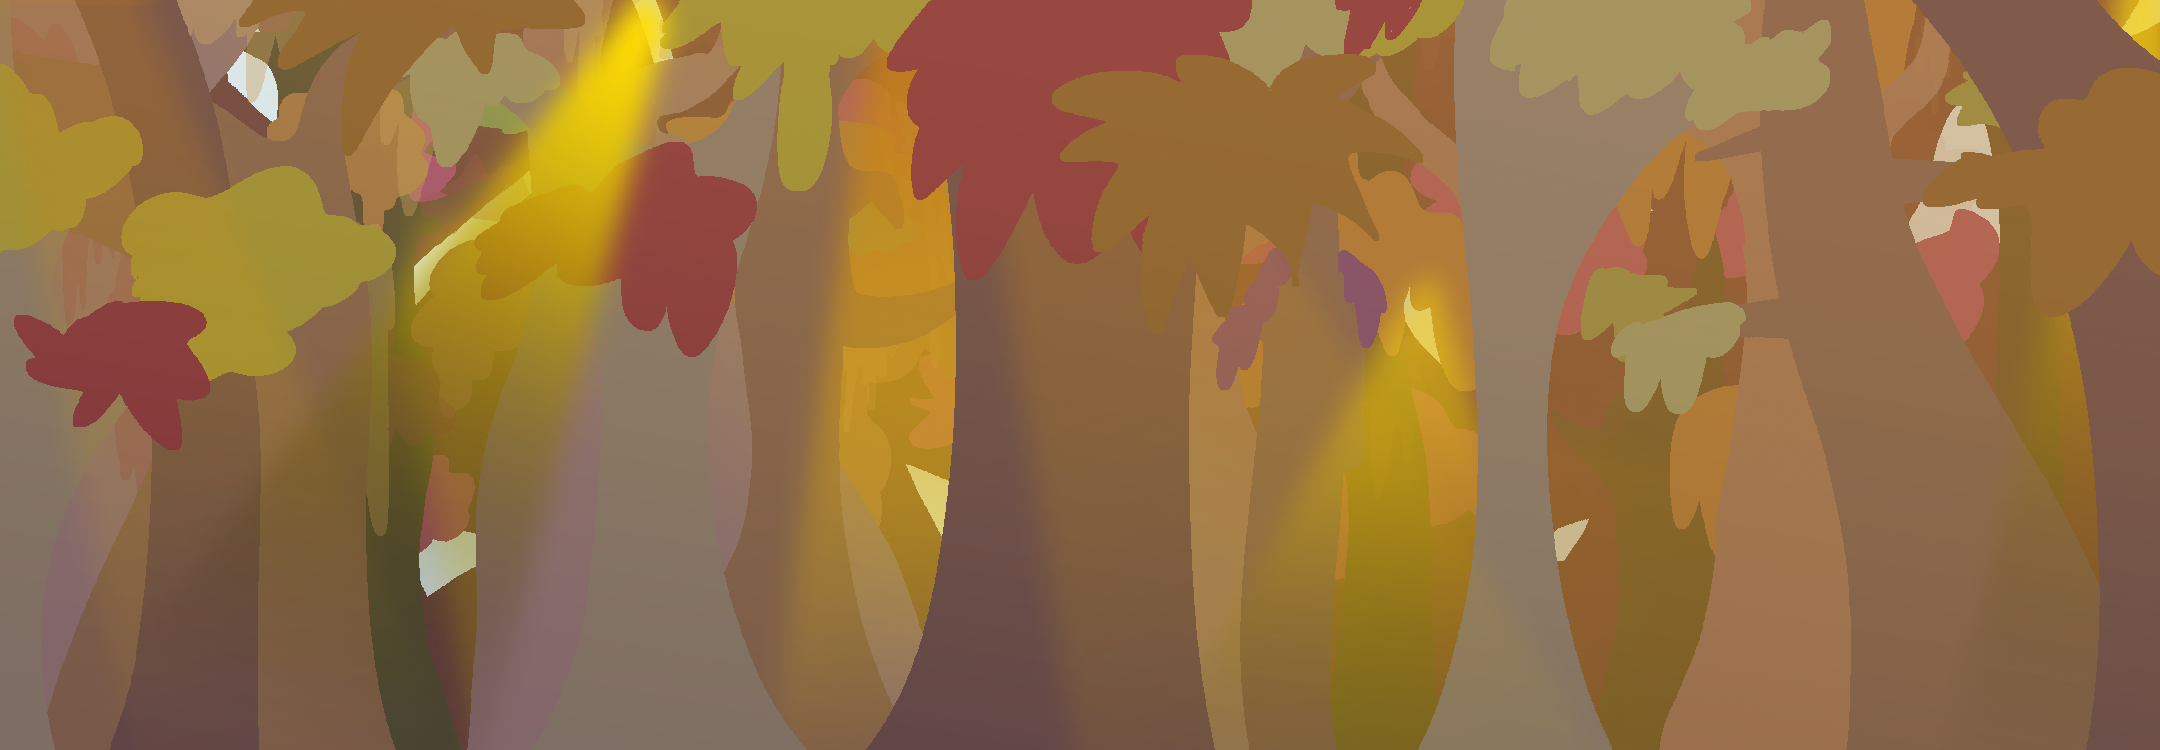
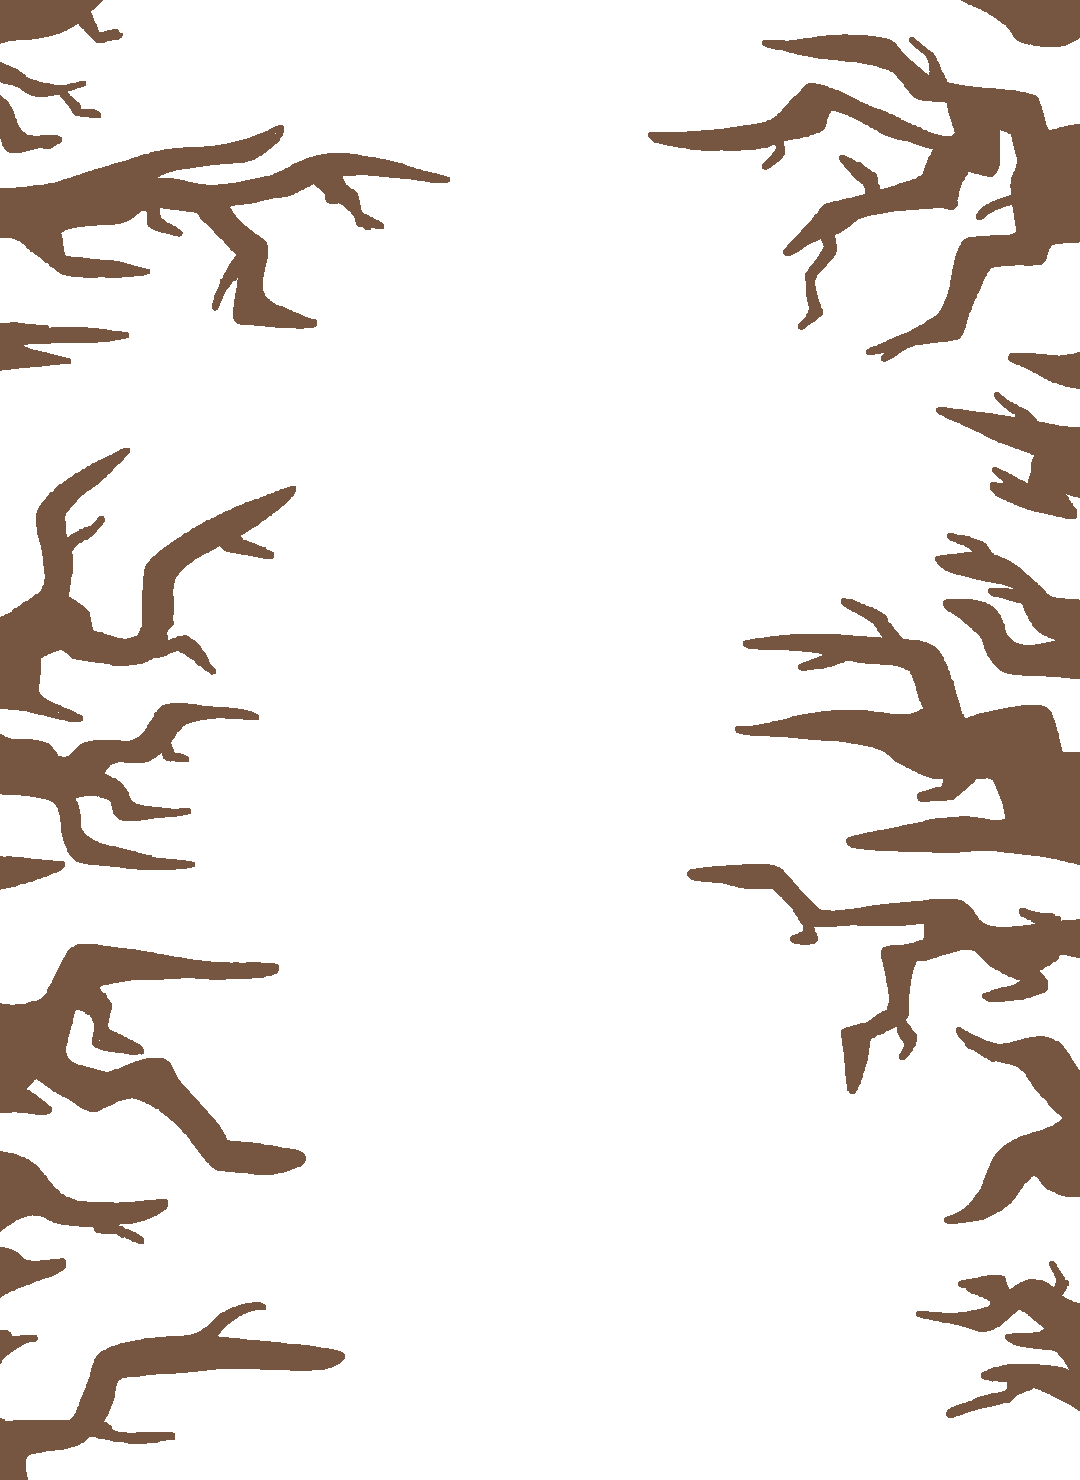
Ryan wanted to simulate a first-person camera moving through a forest at the beginning of the video, and to achieve this, he create several different large backdrops. For the first shot, Ryan created a long, horizontal image of a colorful forest in Adobe Photoshop, then used the camera position keyframes in Adobe Premiere to move the camera slowly across the drawing, from left to right. Following this same technique, Ryan made long, vertical visuals for trees without leaves in winter, which fades into the same trees with leaves, in the summer, all while the camera continues to scroll. Lastly, Ryan also made an image of a floor covered with leaves, achieving this through creating his own custom Photoshop brushes, shaped as different types of leaves. These extensive backdrops, when combined with the motion of the camera in Premiere, create an exciting, colorful visual that keep the audience engaged.
“TLCoL: Forest Wall Scrolling Background”
“TLCoL: Forest Winter Sky Scrolling Background”
“TLCoL: Forest Summer Sky Scrolling Background”
“TLCoL: Forest Fall Floor Scrolling Background”
Combination of Techniques
Using a similar technique of moving a camera in Adobe Premiere, across a large piece of art made in Photoshop, the section of the video that discusses Microbes (1:22-1:48) simulates motion across an over-sized animation, changing focus along the scene. In this part, Ryan frame-by-frame animated the tree drinking water, and the microbe eating then spitting out the nutrients from dead leaves, in Adobe Photoshop using an XP-Pen Tablet. With the frame-by-frame animation complete, the motion of the leaves and nutrients were done by using Adobe After Effects on top of separate, small drawings of leaves to simulate fluid motion as they drift through the wind. With all the aspects of the scene animated on the large canvas, Adobe Premiere was used to move the camera across the scene, following the leaf as it blows slowly down.
Techniques like in the previous example, of using After Effects for fluid motion, Premiere for basic motion, and Photoshop for creating the art assets and frame-by-frame animation, were used throughout the video. These techniques were used in various ways with unquiet visuals in each scene, with the intent of keeping the video consistently engaging.
“TLCoL: Microbes Scene Without Camera Movement or After Effects” Drafting
Rotoscope Animation
Ryan has always been fascinated with various animation techniques, and one of his favorites to explore is the rotoscope technique. He used this technique, of tracing around real-life footage, to make several segments in The Life Cycle of Leaves. For one shot, he filmed himself walking, looking down at the floor. He then traced along this video, making sure to capture the indents and folds of his jeans to give the animation as much weight and realism as possible. To make the coloring process easier, Ryan did the outlines for each different moving aspect of the body in a different color. By coloring the lines differently at first, Ryan could then know what areas to fill with what color on the next stage, without getting certain parts confused with others. When the rotoscope animation of him walking was complete and colored, Ryan put it on top of the large image of leaves on a path, following the camera’s motion, to make it seem like the audience is walking across a forest themselves (0:13-0:19). This same technique was used for the scratching the chin scene (0:29-0:40) and the zipping up the jacket scene (0:08-0:12).
“TLCoL: Walking Rotoscope Animation Outlines” Drafting
“TLCoL: Zipping Jacket Rotoscope Animation Outlines” Drafting
“Drag Me”
Made during Ryan’s Spring 2021 (6th) semester at GMU. Created for the “Self-Portrait Video” assignment in Professor Durkin’s AVT 280 Introduction to New Media Art course.
“Drag Me” Without Effects
“Drag Me” With Effects
In order to make a self-portrait video, Ryan decided to animate a self-portrait of himself going through a burnout. Representing a part of himself that Ryan is working on, he sometimes finds himself suddenly exhausted, ‘burnt out,’ and needs something or someone to drag him out of it. This usually comes in the form of a quick break from whatever Ryan is doing, usually to enjoy some media like comics, YouTube videos, or TV shows. This drag him out of the burn out, and Ryan is able to quickly get back to work. The version of the animation without effects shows the animation by itself, while the version with effects showcases objects that Ryan often uses to get out of his burnout in the glitching background.
This video was made using an XP-Pen tablet and Adobe Photoshop to animate this, frame-by-frame. Ryan started the process by drawing the key moments of the animation first, then slowly drawing frames in-between to blend those moments together. For the effects in the background, Ryan used Adobe After Effects to create a glitchy effect on top of images that pass by the screen at increasing speeds as Ryan melts in the animation. This chaotic, intentionally visually inconsistent background is meant to invoke a feeling of stress, a feeling often felt by Ryan when he is burnt out.
Bonus Editing Showcase
“Nuclear Solution”
-Dark Humor Warning-
Made during Ryan’s Spring 2021 (6th) semester at GMU. Created for the “Banal Surreal” assignment in Professor Durkin’s AVT 280 Introduction to New Media Art course. Only the video’s editing and its compilation of other’s assets were done by Ryan Bone. Other sources are listed in the YouTube video description.
“Nuclear Solution” Dark Humor Warning [Video edited by Ryan Bone. All sources are listed in the YouTube video description]
When Ryan was tasked with taking something that is often seen as mundane, and making it surreal in video form. When researching potential topics, Ryan discovered that there were two nuclear energy facilities powering Virginia, something he never knew until then. Out of pure interest, he watched Dominion Energy’s video explaining why nuclear energy is perfect for Virginia, and Ryan was put off by how many times they mentioned the word safety and the Fukushima tragedy. The attempt by Dominion Energy to normalize nuclear energy in people’s mind while simultaneously mentioning safety so many times you begin to wonder more about the dangers, Ryan felt editing the video into something even weirder would be fun juxtaposition.
The original Dominion Energy video was mostly narration, so Ryan transcribed the video into Microsoft Word and began reading over the whole video to come up with ideas. Through leaving notes in the document, and coming up with several jokes and random editing ideas from this script, Ryan began work in Adobe Premiere. Most of the video is made to be ironic given the subject matter, but given that the subject matter is something that the narrator needed to consistently specify that it was safe, the jokes often ended up being more dark in nature.
3D Animated Videos
“Exit”
Made during Ryan’s Spring 2022 (8th) semester at GMU. Created for the “Final Animation” assignment in Professor Rhoades’ AVT 383 3D Experimental Animation course. All art is created and edited by Ryan Bone, except for the sound effects and music which are credited at the end of the video.
“Exit” [Audio content is not directly made by Ryan and is shown in the end credits]
Background
Exit is a short film made by Ryan Bone, where a thief chases after a glowing orb, but the thief painfully fails his mission. Made in Autodesk Maya with the Arnold Renderer (with textures made in Adobe Photoshop and the video edited in Adobe Premiere), Ryan wanted to make a video that focuses on several moving light sources in a dark area. The bright orb causes the thief to glow a sharp blue color, while the lights in the background pass by quickly, giving the audience occasional bright glimpses of the thief’s silhouette. The motion displayed in those flashes of light need to be striking, so Ryan animated the thief to have large, exaggerated motions throughout every bone in his body. Distinct silhouettes, lighting, motion, and colors make for a video that is striking to watch.
Animation Intent
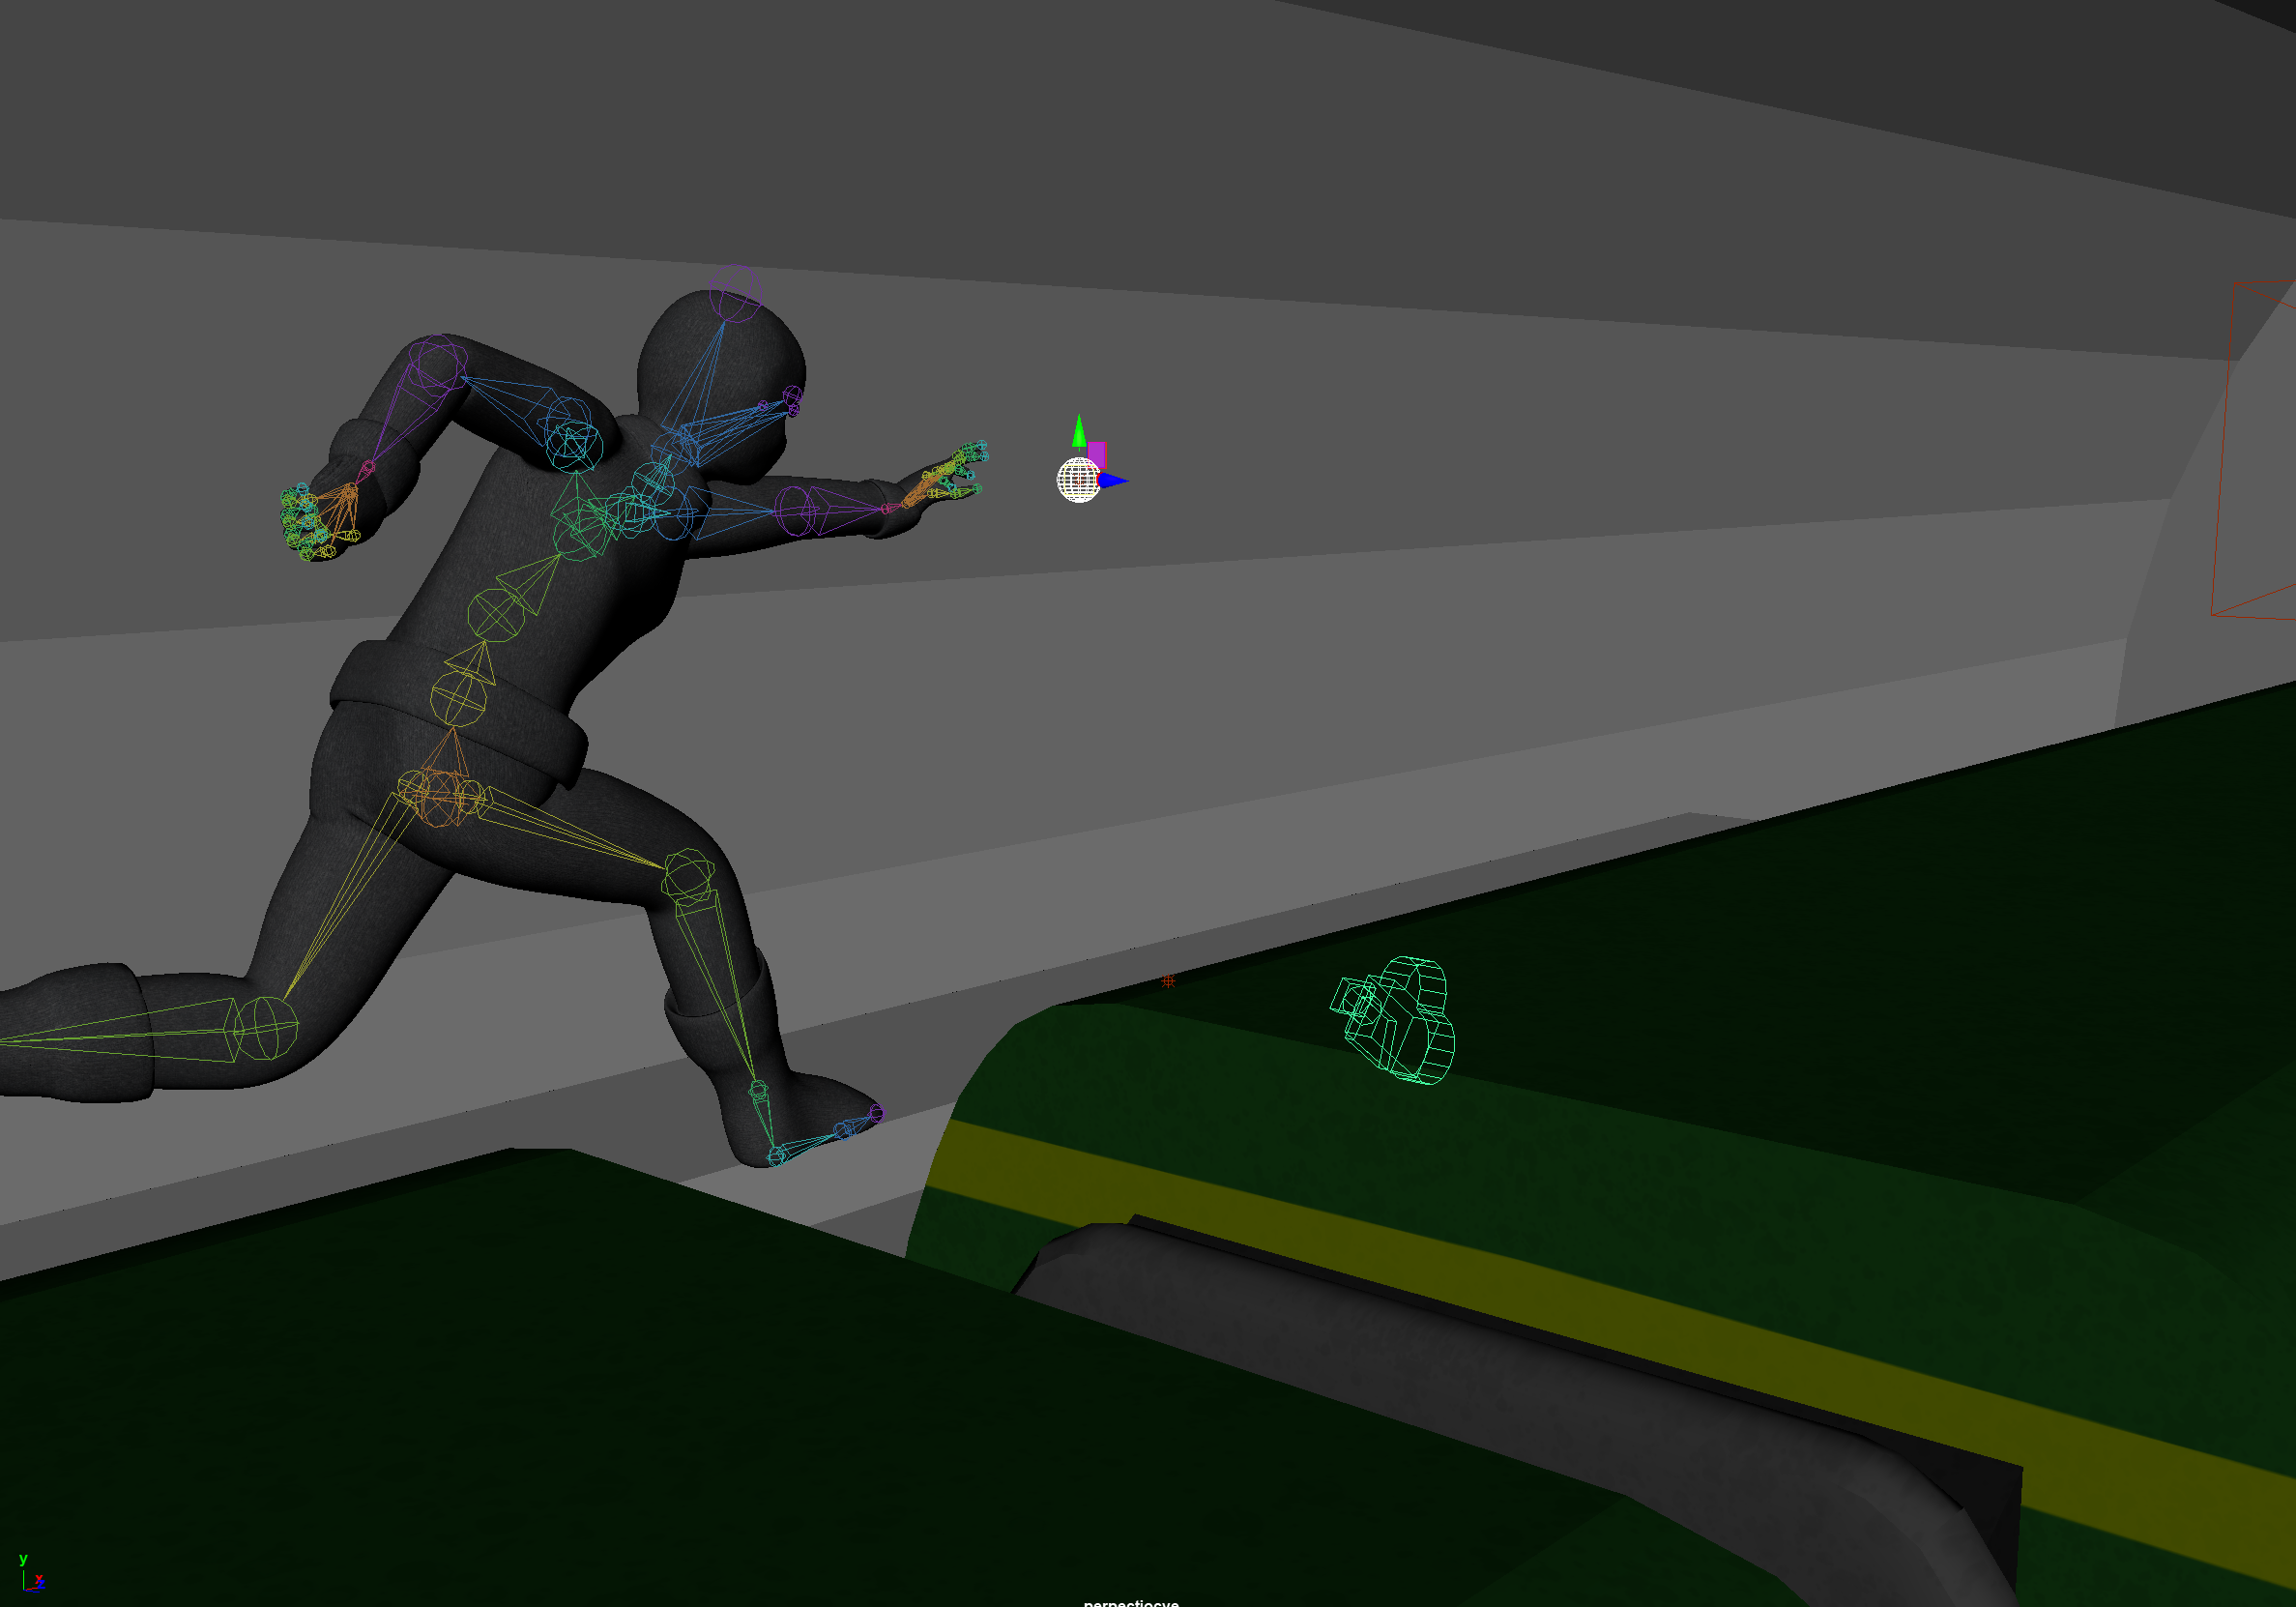
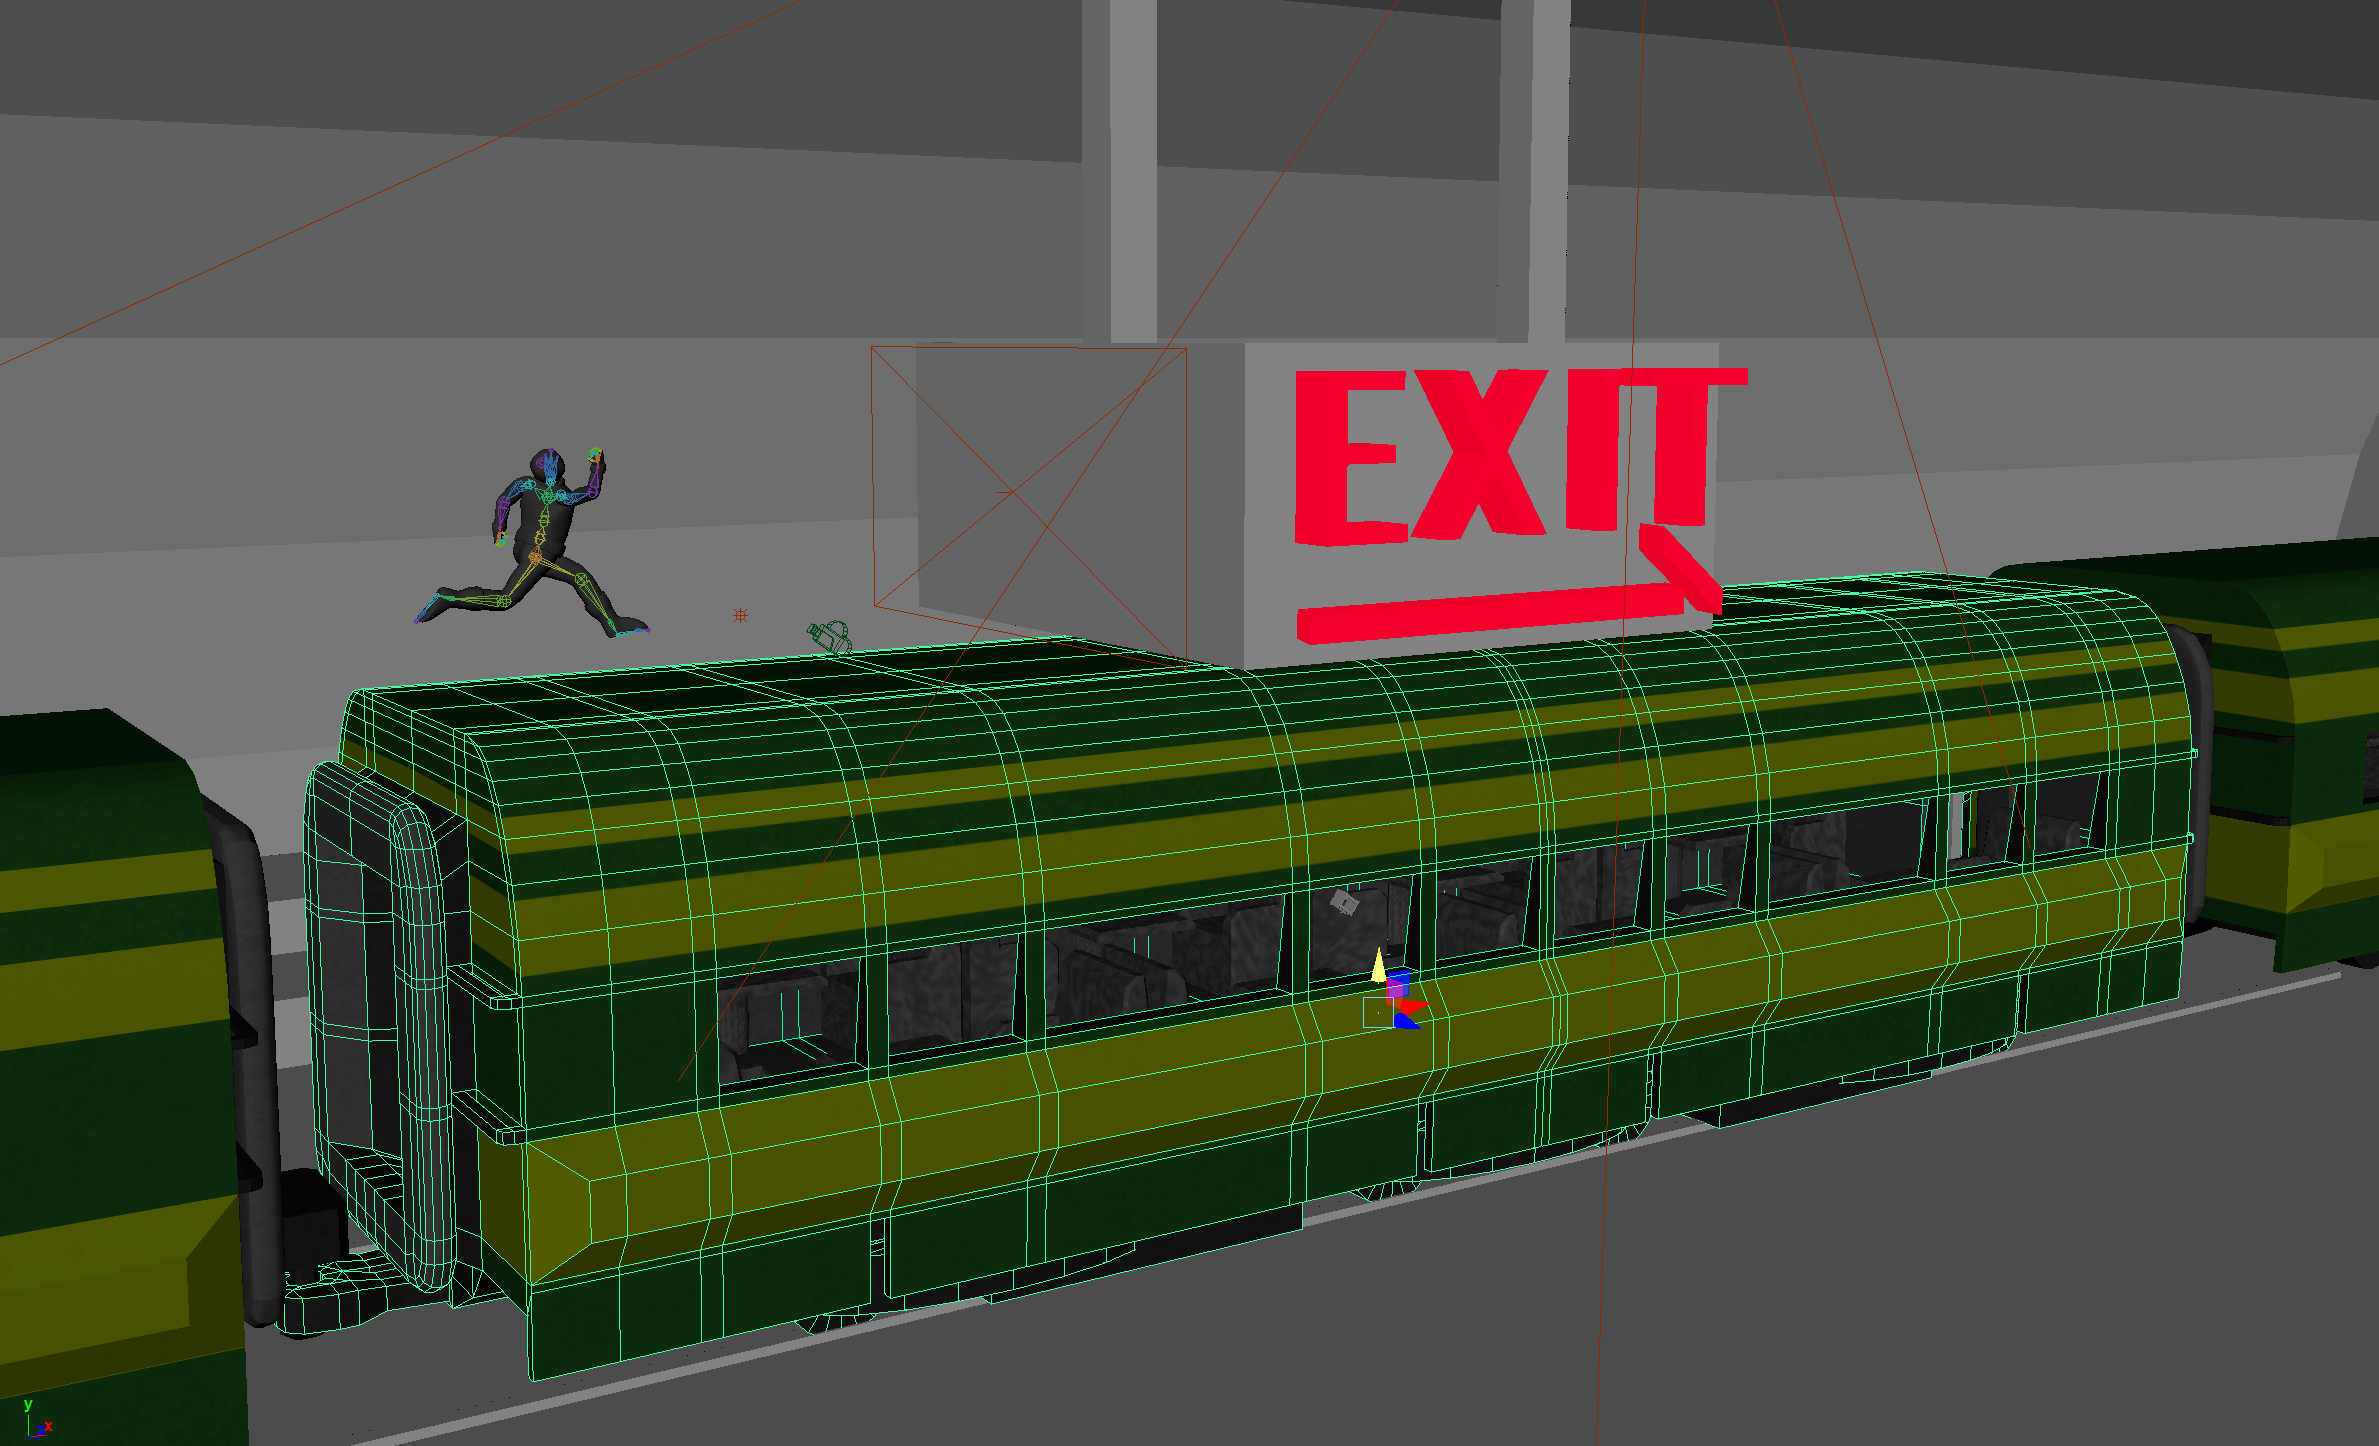
When Ryan decided to make an animation that used visually striking silhouettes, and bright lights in a dark area, he decided the best way to show this off would be to have a chase on top of a train. With this premise, the large, clunky shape of a train would frame the scene well and give a sense of speed, and trains are often in tunnels, which have sparingly distanced light sources, perfect for occasionally highlighting the edges of a character’s body. The premise now decided to be a chase, Ryan decided to have the main character be a thief running after a glowing orb. With the idea of a thief, the body could be simplified into wearing thick clothes that cover most of the body, allowing for most of the emotion to be displayed through the eyes or the body poses themselves, which were already the focus of this animation. Having a glowing orb be what is chased allows for the light on the front of the thief to grow brighter as he gets closer to his objective, creating light on his body where before there was none. With all this planned, Ryan decided to have the video end in a humorous way, allowing for the intense motion of the lights, train, thief, and orb come to an immediate, screeching halt. An exit sign, with its bright red colors, would perfectly contrast the blue of the orb. In contrast, as the blue orb got closer, thereby having the thief be closer to his goal, the blue light represented figurative closeness to victory, when the red light of the exit sign slowly approached the thief, eventually literally representing his closeness to failure.
“Exit Train Low Camera Angle” Drafting
“Exit Train Model Before Crash” Drafting
Animation Process
Ryan started making the animation by first modeling the thief, UVing and texturing, then rigging and skinning the model carefully, as to allow for the most extreme body movements possible. Then Ryan modeled, UVed, and textured the train cars, which were mostly symmetrical, making the process much easier. The modeling, as with the animation process itself, was done in Autodesk Maya, with textures made in Adobe Photoshop. After this, lights were placed, while the background objects were made, but kept simple, and in gray, so that all the backgrounds defined was the lights that shined on them. With this all complete, Ryan moved on to key framing each of these aspects.
The largest challenged faced was to trick the audience into believing that the train was moving much faster than it actually was. The thief was framed in the center of the cameras, only barely moving left and right with the motion of his kicks and leaps off of the train cars. To keep the thief centered, the camera would stay exactly in place and each of the other objects besides the thief would need their movement to be simulated in reference to the thief’s consistent position. Ryan did some math and watched some media that had train top chases for reference to get the speed and direction in which each object should move. The train below the thief’s feet moves left at a consistent pace, following reverse of the thief’s movement, while the tunnel lights fly quickly by the train to the left, as the indicator of the rightward speed that the train in supposedly going in. Animating like this was confusing, so Ryan kept notes regarding the velocity of each object so that it would remain consistent and logical.
With the movement of the objects done, the thief was then animated in his running cycle. Rather than focusing on logical 3-dimensional movement, Ryan decided to focus on 2-dimensional movement, since the camera always faced the thief from a consistent, unmoving angle, and occasional lights appear to show the silhouette, what mattered most was the exaggerated framing of the body. After many tests, feedback from peers, and lengthy Autodesk Arnold Renderer renders, the animation was complete, and the final video with audio was compiled in Adobe Premiere.
“The Goo Cleaner’s Slimy Demise”
Made during Ryan’s Spring 2022 (8th) semester at GMU. Created for the “Midterm Animation” assignment in Professor Rhoades’ AVT 383 3D Experimental Animation course. All art is created and edited by Ryan Bone, except for the sound effects and certain 2D textures which are credited in the description of the YouTube video.
Ryan made The Goo Cleaner’s Slimy Demise in Autodesk Maya. Since he was tasked with making a short video, Ryan decided it would be fun to make an animation where the focus is on the shifting size of objects. Doing this, Ryan had a slime of shifting size absorb and shrink down a table. The camera follows the shrinking of the objects, being sucked into the slime as well, adding to the effect. Eventually, the slime seemingly gets its comeuppance when it is shrunk and absorbed by a cleaner, though his cleaning device expands and explodes, ending the video. The camera is frequently in motion, following the action as close as possible, being sucked into the chaos and danger of the inconsistently sized objects in the room, keeping the audience on edge, following along with the changes.
“The Goo Cleaner’s Slimy Demise” [Video edited and animated by Ryan Bone. All outside sources are listed in the YouTube video description]
“Wildest West”
Made during Ryan’s Spring 2022 (8th) semester at GMU. Created for the “Final Motion Capture Animation” assignment in Professor Willis’ AVT 399 Motion Capture for Game Design course. Part of a group project, but writing the script, drawing the storyboard, acting for the thief and the bank teller, voice over for the patron, and video and sound editing were done by Ryan Bone.
“Wildest West” [Video edited and partly acted by Ryan Bone. All outside sources are shown in the end credits]
Background
Ryan, in a team of four, was tasked with making a short film using motion capture suits and software. The team consisted of Brendan McDermott, who edited one scene’s data, then found, organized, and compiled 3D assets from online storefronts, Brennan Richardson, who edited three scenes’ data and transcribed the script, Trevor Simonson, who brought the animations and sounds into Unreal Engine, where he worked with the lighting and camera, and Ryan Bone, who drew the storyboards, edited three scenes’ data and edited the footage and sounds together in Adobe Premiere. The motion capture data was captured at George Mason University’s Black Box venue with Professor Willis’ equipment. The data was recorded into Autodesk MotionBuilder, where Ryan and the team cleaned and edited the data. Together, the group came up with the plot of Wildest West, with the intent to have as much fun motion capturing the characters as possible, while telling a funny story.
Acting
With a script, scene list, asset list, and storyboard made for Wildest West, the team were able to be the first group to put on the motion capture suits and record. Ryan and Trevor Simonson were the actors in the suits, while Brennan Richardson recorded the live footage from a phone for reference, while reading the script aloud, and Brendan McDermott recorded and organized the motion capture data within Autodesk MotionBuilder. Ryan and Trevor which switch between what characters were needed in each scene, with Trevor consistently playing the sheriff, the horse, and the patron woman. Ryan played the bank teller and the robber. Each scene required multiple takes, since motion capture can be finnicky, but in the end the team had captured some good data to work with.
“Wildest West Motion Capture Suit Bank Teller Clip”
Editing
With the motion capture data recorded, the data needed to be cleaned of any issues or bugs. The team split up the work and it was all manageable to edit in MotionBuilder, until the final scene where Ryan, the thief, gets knocked to the ground by Trevor, the horse (1:30-1:41). Because the scene had Ryan laying on the ground, some of markers on his suit were covered by his body, not visible to any of the cameras recording the data from up high. This took Ryan many, many hours to repair the data for, but the effort was worth the struggle, as that scene worked perfectly as the punchline for the video!
With the data cleaned, the animated models were put into Unreal Engine, where Trevor Simonson put together the lighting and cameras, while the rest of the team provided feedback and ideas to frame scenes better. Once Trevor put sound effects into the animations, the team came together and each recorded the voice lines for a character. Trevor then sent Ryan the Unreal Engine footage, and Ryan used Adobe Premiere to put the video, sound effects, and voice lines all together. With some final tweaks made during this stage, Wildest West was complete.
“Wildest West Motion Capture Suit Bank Teller Clip” [Video also features Trevor Simonson, Ryan Bone is the one who falls]

